
Touch the green dots to read the instructions!
1. Install everDOCs Bridge on Your Computer
- Download everDOCs Bridge for Mac or Windows from the links below and install it on your computer or server:
... or get the Apple-approved OSX version directly from the Mac App Store:

- Open everDOCs Bridge:

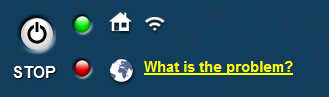
The private cloud service is in the state "Stopped" and awaits a short configuration.

2. Configure Your Private Cloud
- Open the tab 'Shared Folders' and press 'Share Folder'. Declare any folders/directories to by 'Shared'. These folders will be shown at the beginning of the main list of the everDOCs iOS App on your iDevice. You can invite your friends to view your Shared Folders. Every 'Shared Folder' can be given a picture using the green '+' button.
- Activate the checkbox 'Show All Drives' if you want remotely browse all the drives on your computer from your iDevice. If it is not activated, you will only be able to see 'Shared Folders'.
- Activate the checkbox 'Show Only Documents' to list only document files which can be opened from the everDOCs iOS app on your iPhone or iPad and hide all other files.
- Go to the 'Settings' tab and change name and the password for the master user. Username and password are both set to "admin" by default.


- Optionally change the IP Ports in 'Connection Settings'. Ports between 50000 and 65000 are recommended, e.g. 55000-56000. The checkboxes 'Enable NAT-PMP' and 'Enable UPnP' should be active: This way, your Private Cloud will automatically configure your router. If your router does not support this, you have to manually configure 'Port Forwarding'. Read your the manual of your router to do this.
(If you use port forwarding, you do not need a port range, but one single port, e.g. 55000-55000).) - When 'Use SSL Encryption' is activated, the communication between your computer and your iPhone or iPad will be securely encrypted for enhanced safety. You need an Add-On in your iOS App to use encrpytion!
- If you want to send documents by email or send emails to friends to invite them to 'Shared Folders', go to the 'Settings' tab and fill the following fields:
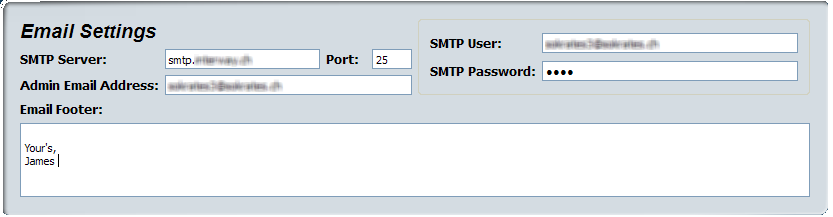
The footer text will be appended to every email you write. - Press "Start" to start streaming right away.
- Install the everDOCs iOS app from the Apple iTunes App Store and enter the Bridge ID from everDOCs Bridge in the connection window. Log in using the Master User's name and password.
- Start Remote Browsing and Document Viewing, Document Mailing and Selective Sharing with your everDOCs Private Cloud!
3. Get And Run The everDOCs iOS App on Your iPhone / iPad / iPod Touch
-
Install the everDOCs iOS App from the iTunes AppStore.
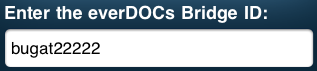
- Start the app and enter the Bridge ID to connect to your Private Cloud. Your personal Bridge ID for your own private cloud is displayed in everDOCs Bridge on your computer:


- Press 'Connect' to create a connection to your Private Cloud.
- Use only lowercase characters for the Bridge ID. If you have any connection problems: Please verify the Bridge ID.
4. Browse Files and Folders and View Documents on the Road
-
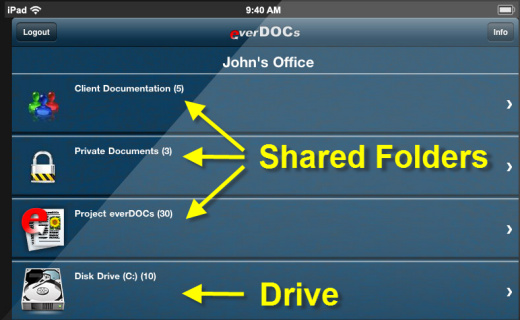
After logging in, you will be able to browse through Shared Folders, drives, subfolders/subdirectories and files:

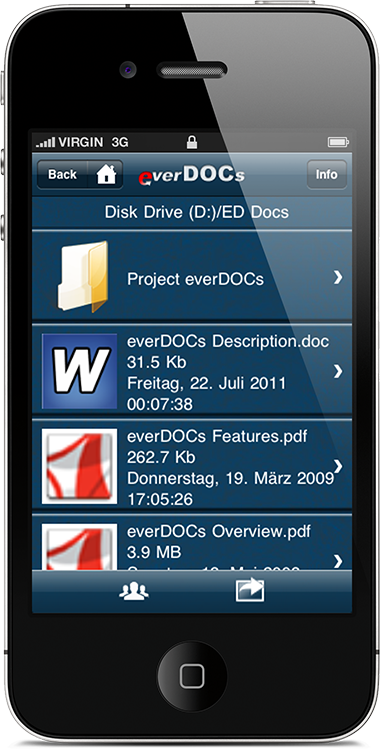
- Click on a document file (iWork, MS Office, text files, pdf's etc.) to open and read it:

- The free app only supports pdf files. To see other document types, please purchase the add-on "Document Package" in the navigation bar on top.
- If you do not see any drives for browsing, you have to activate "Show All Drives" in the tab "Shared Folders" of your everDOCs Bridge installation.
5. Remote Email Files
Let everDOCs send any files to any email address whenever you need them. The email message is written on your mobile Device, but the email itself including the (optionally zipped) file attachments is sent by your everDOCs Bridge private cloud software directly from your computer to keep internet traffic minimal. Use this feature to use documents in other apps or to send files to other people or devices.
- Please make sure the email settings are correctly set up: They can be found in the "Settings" tab of your everDOCs Bridge installation on your computer. It sends the emails directly and does not use other email clients.
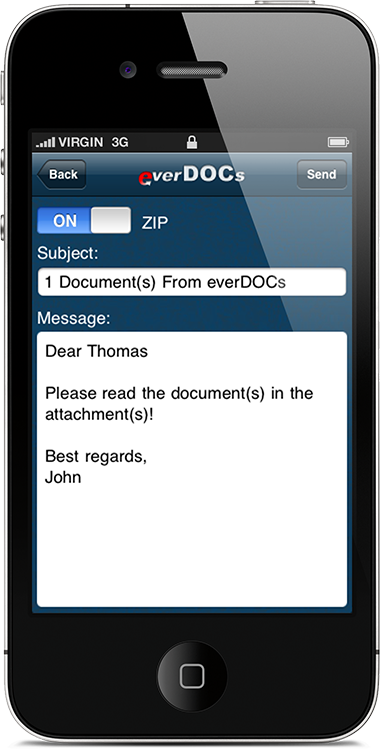
Use ![]() in the navigation bar of your everDOCs iOS App when you are reading a document or
in the navigation bar of your everDOCs iOS App when you are reading a document or ![]() in your toolbar when you are browsing a folder/directory to send one or any number of selected files as email attachments from your computer.
in your toolbar when you are browsing a folder/directory to send one or any number of selected files as email attachments from your computer.
6. Share Folders With Friends
Shared Folders
As the administrator of your everDOCs Private Cloud you can see all your folders and files. However, in real life some folders are more equal than others ;-): They are more frequently used or they even can be shared with other people. These folders/directories are called "Shared Folders".
Shared Folders are listed on the first page in everDOCs , even before your drives. They are immediately recognizable on their (customizable) icon.
Create Shared Folders and Send Invitations
There are two ways to create shared folders:
-
In everDOCs Bridge on your computer: Use
 to select folders/directories. You can rename them or assigning a customized picture with the
  button.
-
In the everDOCs App on your iDevice: Tap the "Invite" symbol
 to write an invitation email for the actual folder somewhere in one of your drives. This folder automatically becomes a Shared Folder.
Users Assigned to Shared Folders
Besides being listed first in everDOCs, Shared Folders get an important property: Shared Folders can have Users assigned with specific access rights. Every time you invite a friend to a Shared Folder, he automatically becomes a User of this folder.
Use the "Users" tab in everDOCs Bridge to manage these users, their assignments to Shared Folders and their access rights.
The "Shared Folders" tab lets you manage each Shared Folder and its assigned users. New users can be invited directly from here.
- Invitations from the iOS App and from the Bridge only work if the email settings are correctly set up: They can be found in the "Settings" tab of your everDOCs Bridge installation on your computer. It sends the emails directly and does not use other email clients.
Accepting an Invitation
When you invite somebody to share a folder with you, he will receive this invitation in his email inbox. To be able to open the folder, the everDOCs iOS App has to be installed on his iPhone or iPad.
Opening your folder he has been invited to requires only two steps:
-
Copy the Bridge ID from the invitation email to the clipboard:
(alternatively you can even copy the complete email text into the clipboard)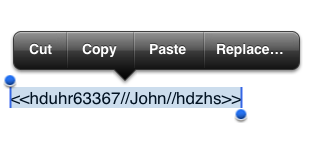
-
Start the everDOCs iOS App, paste the contents of the clipboard into the Bridge ID entry field and press "Connect".

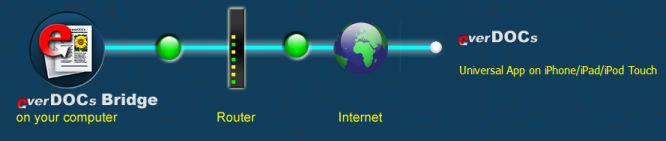
7. Your Router - Connection Between Your Computer and The Internet
Connecting Your Computer and Your iDevice
Your everDOCs Bridge streams documents to mobile devices in your LAN/WLAN or in the internet. To be able to do this, it must be "visible" from the internet, otherwise you will only be able to stream inside your LAN/WLAN.
Your router is positioned between your computer and all devices in the internet and controls all traffic. If you want to stream data to your iPhone/iPad over the internet when you are on the road, your router must support your communication:
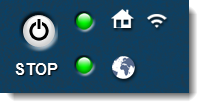
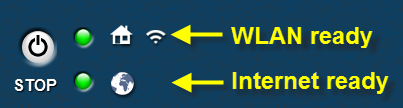
everDOCs Bridge will automatically configure your router and your local firewall to support your everDOCs Private Cloud . If it is successful, it will display its status with two green lights to indicate you can use your iDevice with everDOCs from your WLAN or from the internet:
everDOCs Bridge can use one of the following ways to stream documents over the internet to your iDevice on-the-go:
- UPnP - modern routers support this protocol. It is sometimes required to manually enable this option in the router settings. Please read your router documentation to learn about the correct setup. We recommend to define a range of port numbers in everDOCs Bridge, e.g. 55000 to 56000.
- NAT-PMP - this is an alternative if UPnP is not available. It is sometimes required to manually enable this option in the router settings. Please read your router documentation to learn about the correct setup. We recommend to define a range of port numbers in everDOCs Bridge, e.g. 57000 to 58000.
-
Port Forwarding - when both UPnP and NAT-PMP are not supported or not allowed, you will have to manually instruct your router to forward a specific "IP Port" to your computer and to everDOCs Bridge. You will find the IP Port and your local IP address in "Connection Settings" in the "Settings" tab. We recommend to define a single port with a high number in everDOCs Bridge, e.g. 58000 to 58000. Please read your router documentation to learn about the correct setup or ask your system administrator.
There is free software which can help you to forward a port (e.g. http://www.simpleportforwarding.com)
Typical Solutions to Connectivity Problems
When your Private Cloud can not get access to the internet, it will display a red warning light:
You will still be able to use everDOCs within your WLAN, but not from the Internet.
How to solve connection issues:
- Use another port for Port Forwarding.
- Use a static IP for your Bridge Server (read your router documentation for this).
- Restart your router.
- Check your firewall software. Does it block everDOCs data traffic?
8. FAQ About Connectivity Problems
After having started everDOCs Bridge, I get a green and a red light and the following message: "Warning: Internet connnection is probably down. Only LAN/WLAN access is possible." What should I do?
This may happen when the everDOCs Bridge is not able to find the everDOCs connection server on the
internet.
Typical reasons:
- Internet Connection: Your internet connection is down.
- Internet Firewall: You have installed a firewall on your computer or in your network which does not allow everDOCs Bridge to access the Internet. everDOCs Bridge is able to bypass the standard Windows Firewall without help, but if you are using a 3rd party firewall which blocks IP ports, you must configure it manually. Open the firewall's configuration dialog and open the IP port number (for incoming and outgoing connections) used by everDOCs Bridge: The IP port number is shown in the Settings tab in everDOCs Bridge. It can be changed, but the Bridge has to be stopped to do this.
Even without an internet connection you should still be able to use the everDOCs App or everDOCs Online from your iPhone within your WLAN.
I have successfully started the everDOCs Bridge, but I get a green and a red light and the following message: "Warning: Your IP or port have changed and are no more visible from the internet." What should I do?
The green icon indicates that you can access everDOCs Bridge from your iPhone in your WLAN, but not from outside over the internet. The access from outside is most probabely blocked by your internet router.
To make your Bridge visible 'worldwide' for your iPhone when you are on the road, your router has to be configured properly.everDOCs uses a numbered 'door' through your router to the internet, the so called "IP port":
- Automatic Router Configuration: Normally, you do not have to care about this: everDOCs does open this "door" automatically (if UPnP and NAT-PMP have been enabled in the Settings tab). This works fine with routers of an actual generation, but can cause problems with older ones.
- Manual Configuration of Port-Forwarding on the Router: In some cases, you will have to set up "Port-Forwarding" on your router for the IP port used by everDOCs. This is a very simple process and can be done in a minute or two:
1. Check the Settings tab in everDOCs and find the "IP Port" field: It shows the port which is used by everDOCs. If necessary, you can change it when everDOCs is stopped. The IP port can be in the range of 1024-65534 (default is 9999).
2. Find the "Local IP address" in the same tab.
3. Now open your router configuration software or website (consult the manual!) and find "Port-Forwarding". Set the port number for your local IP address - that's it!
4. We recommend to use a static IP address for your computer, if you configure port-forwarding. Static IP addresses do never change, as opposed to dynamic IP addresses. Set up static IP addresses on your DHCP server. Typically, your DHCP server is your router, so you can set a static IP address for your computer using the same configuration tools you used for port-forwarding.
There is much help about configuring port-forwarding in the internet. There is even a tool available which can do the job for you: Have a look at http://www.simpleportforwarding.com.
How can I know if my everDOCs Bridge is accessible from the Internet? I want to be sure I can watch my documents on the road using 3G or a WLAN on another location.
Start your server by clicking the 'START' button on the 'Published Catalogs' tab. Now you should see two icons on the right side of the START/STOP button. If both icons are green your everDOCs Bridge server is accessible from the Internet (the IP port is successfully forwarded). If the lower icon is red, only LAN/WLAN access is possible (your iPhone must be in the same LAN/WLAN as your computer running everDOCs Bridge). The following warning is shown: "Your IP or port have changed and are no more visible from the internet."
"Server failed to start listener on IP address: 0.0.0.0, at port: 6666, reason: The bound address is already in use!" What does this mean?
everDOCs Bridge was unable to start because another application is already using the same IP port number, e.g. 6666.
Go to the Settings tab of everDOCs Bridge and set another IP port value (number from 1024-65534, e.g. 10000) into the entry field.
I have two green lights in everDOCs Bridge, but my app shows an error "Matching Server Not Found".
Please carefully verify your Bridge ID: It consists of fiver lower-case characters and five digits.